Showing posts with label in the kitchen. Show all posts

Saturday, May 10, 2014

DIY with Vintage ... Pantry Make-over

Okay this is embarrassing, but yes, this is my pantry.
In a house with not enough storage anywhere, my kitchen is the same.
Way too much gets shoved in here and every once in a while it needs a facelift.
lets take a look ....

Friday, March 28, 2014

Tea Party please ...

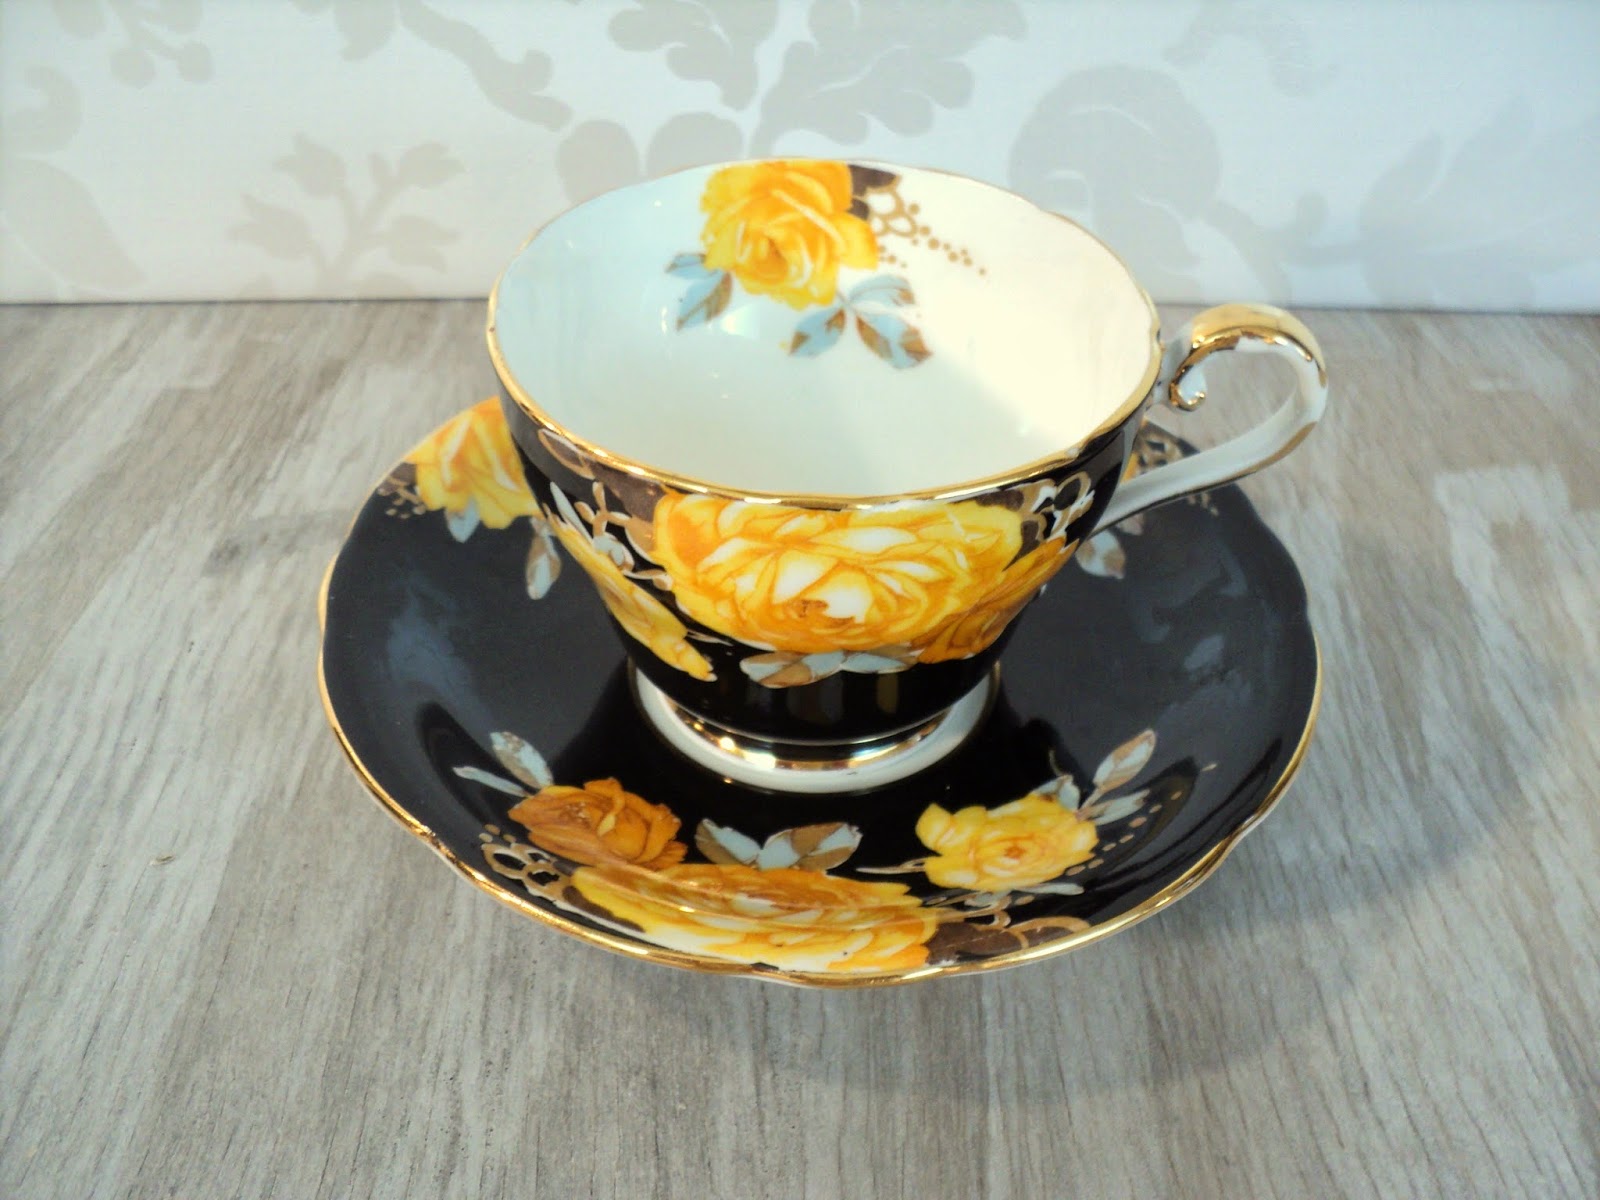
Yellow Tea Rose on Black

Assorted mixed bone china and ironstone cups

Red Poppies by Bavaria Schumann

Mushroom Pattern by Aynsley
Pansies on Lime Green by Foley
Fish Motif by Toyotoki Japan

Some beautiful teacups I have had the pleasure of meeting ...

Dahlias on mint green by Paragon

Sunday, August 12, 2012

Delicious Iced Coffee Recipe

Call me cheap, but I can't bare to throw out an old pot of coffee.  So started my quest for a delicious, as good as the coffee houses iced coffee ... I do believe I've done it.
1. Perk a pot of coffee, or go to your coffee maker and take the leftover coffee in the pot, pour it into a container and put in the fridge.  I use a mason jar and just keep adding to it. 

2. Make Simple Sugar Mixture - Boil 1 cup water then add 1 cup of white sugar , stir until dissolved.  Put in fridge to cool (for at least 30 minutes or so) This is so easy and this is what makes the iced coffee work. Just make it and keep it in the fridge for when you want to mix up a cool one.
3. Add to your Simple Sugar Mixture 1tsp of Vanilla & 1/2 tsp of Almond Extract and stir.  This is my secret ingredient that makes the coffee absolutely amazing! I am thinking you could easily add peppermint extract or whatever flavour you would like to make it exactly how you want it.
4. Grab your favourite drinking glass, the bigger the better. Fill with ice cubes, then fill 2/3 with black coffee, more or less depending on if you want it darker or creamier.
5. Take your Simple Sugar and add until you've increased the level of the liquid by about an inch. Then top with Cream ... for a lower fat version, use 2%, 1% or almond milk.
 Stir and Enjoy!! Mmmmmm ... isn't it yum?!!


Linked to Twigg studios

Tuesday, March 22, 2011

Vintage Seasame Street Sheet ... to Fun Mini-Chef's Apron

Chef's Hat Coming Soon ...

So a vintage VV Boutique find (ahem Value Village) ... or coulda been Sally Ann's ... (cough Salvation Army cough)  But the Seasame Street sheet could simply NOT have been left behind! ... Taking some quick measurements of my little man, I fab'd the basic pattern, cutting 2 pieces of the body, one of the print and one of the gingham.


Then 'hemmed' the edges to the front so the gingham would 'trim' it.  Plus I kinda like how you can see the gingham pattern through the front.  I think I will try to do a full tutorial on this one day because it is just so simple & quick to make.


The armholes are casing for the Tie so this is totally adjustable for itty-bitty Chefs, to the bigger ones - I think this would even work fine for a 5-6 year old.  My son is 3.5 and in bed now, so I won't make him model it :)
 
Totally Charming!!
 

Sunday, October 31, 2010

A Cake for a 3 year old 'Big' Boy

Of course it had to be spiderman .... the black/red icing turned all of our mouths and teeth purple, but he LOVED it :)

Thursday, January 7, 2010

Canning and how not to be afraid

I know the time of year for canning is now long gone but I got to do some last weekend. It's a good thing Zucchinis seem to last forever! Well, mostly anyways ...

So without allowing myself to waste perfectly good ENORMOUS zucchinis I scoured my canning book for a recipe. I won't bore you with the details but I want to tell you why you don't need to be afraid of canning. Think of it as 3-4 easy small steps depending on what you're doing.

1) Prep ~ Usually for relishes means something is going to be cut up and sitting in a pot with pickling salt overnight & then rinsed off the next day. ~~ So you cut up what you need, throw it in a big stock pot or something stainless steel that will fit it all - sprinkle & mix in the recommended salt & go to bed. SUPER easy right!!

2) Sterilize Jars ~ The next day ~ The recipe tells you how many jars you need - make sure you have them cleaned then set them on a cookie sheet & throw them in an oven set on about 200'F - They can sit in the oven all day if you want to - I just do it first because once I start cooking whatever is in the pot, my mind is on other things. Meanwhile take the snaplids (just the thin round metal part that seals to the jar) and throw them in a saucepan on a back burner on low, just to heat them (no need to boil) - again these can sit there all day as long as there is water in the pan. Oh ya & fill up your canner (the BIG black pot with the wire rack in it) with water and put the burner on medium heat - this sucker takes a while to boil.

3) Cook your mixture ~ If you soaked it overnight make sure it's rinsed well and most of the water has been squeezed out. Add additional ingredients such as sugar, vinegar & spices. Cook for length of time recipe suggests.

4) Pour into Jars & Process ~ Take jars out of oven about 5-10 minutes before cooking is finished to allow them to cool a bit. ~ crank up the heat on the canner to get a boil going~ Once jars cooled slightly (you'll know they are cool enough if the mixture doesn't sizzle when you pour it in) ~ fill jars - remember to add enough liquid to cover the solids ~ wipe jar mouths ~ fish snaplids out of the saucepan and put in place, tighten snapring into place (only handtighten) then place in canner & 'process' as suggested - processing just means boiling them for 'x' amount of minutes.

When processing is done take them out of the canner and let them cool upright on the counter. As they cool the jars will start to 'pop' which means they are sealing - This is a good thing - it means you & your family won't get salmonella poisoning when you finally try whatever you just made.

HaPPy CaNNiNg